The homework will consist of both programming exercises and written questions. This handout describes some general thoughts and techniques for doing homework, as well as what is required, how to submit it, how late homework is handled, and other administrative matters.
Each homework assignment will have four parts: questions about Linux, questions about the C Programming Language, Programming, and Debugging.
The CSIF uses the operating system Linux. This system is widely used in computer science. Many large corporations (and small organizations) use it, or a very similar system called the UNIX system, for their servers and other systems. In this class, we will use this system and require that all programs must run on it.
These questions ask you about the Linux operating system. They will typically be short-answer questions. They may require you to include output from running a command. If so, please include a screen shot showing the result of the command’s execution.
You are to put all the answers into a single file called “Linux.txt” or “Linux.pdf” (depending on whether you use text or PDF; see below). If you have screenshots and do not embed them in the submitted file, put a reference to them in that file and submit them as separate files named “Linuxn.ext”, where n is an integer and ext is an extension indicating the type of image file (like “jpg”, “tif”, or “gif”).
This will typically have 2 questions. You may do either; you are not required to do both.
One (or more) of the exercises will be problems in MyProgramming Lab. Please do these on MyProgrammingLab. When you do them, you will be told if your answer is correct. If not, you should try again; we will grade only the last one (which, we expect, will be correct!) Please turn in a file with base name “MyProgLab” (it does not matter what it contains or what the file name extension is) so we know to grade those exercises.
The other exercises will be review questions from the textbook. These will be either written answer or require a snippet of code. Unless the exercise specifically asks you to write or alter a program, please do not include a full program! Just include the snippet of code.
You are to put all the answers into a single file called “CPL.txt” or “CPL.pdf” (depending on whether you use text or PDF; see below).
This section will require you to write or modify one or more programs. These will be graded both for correctness and for style.
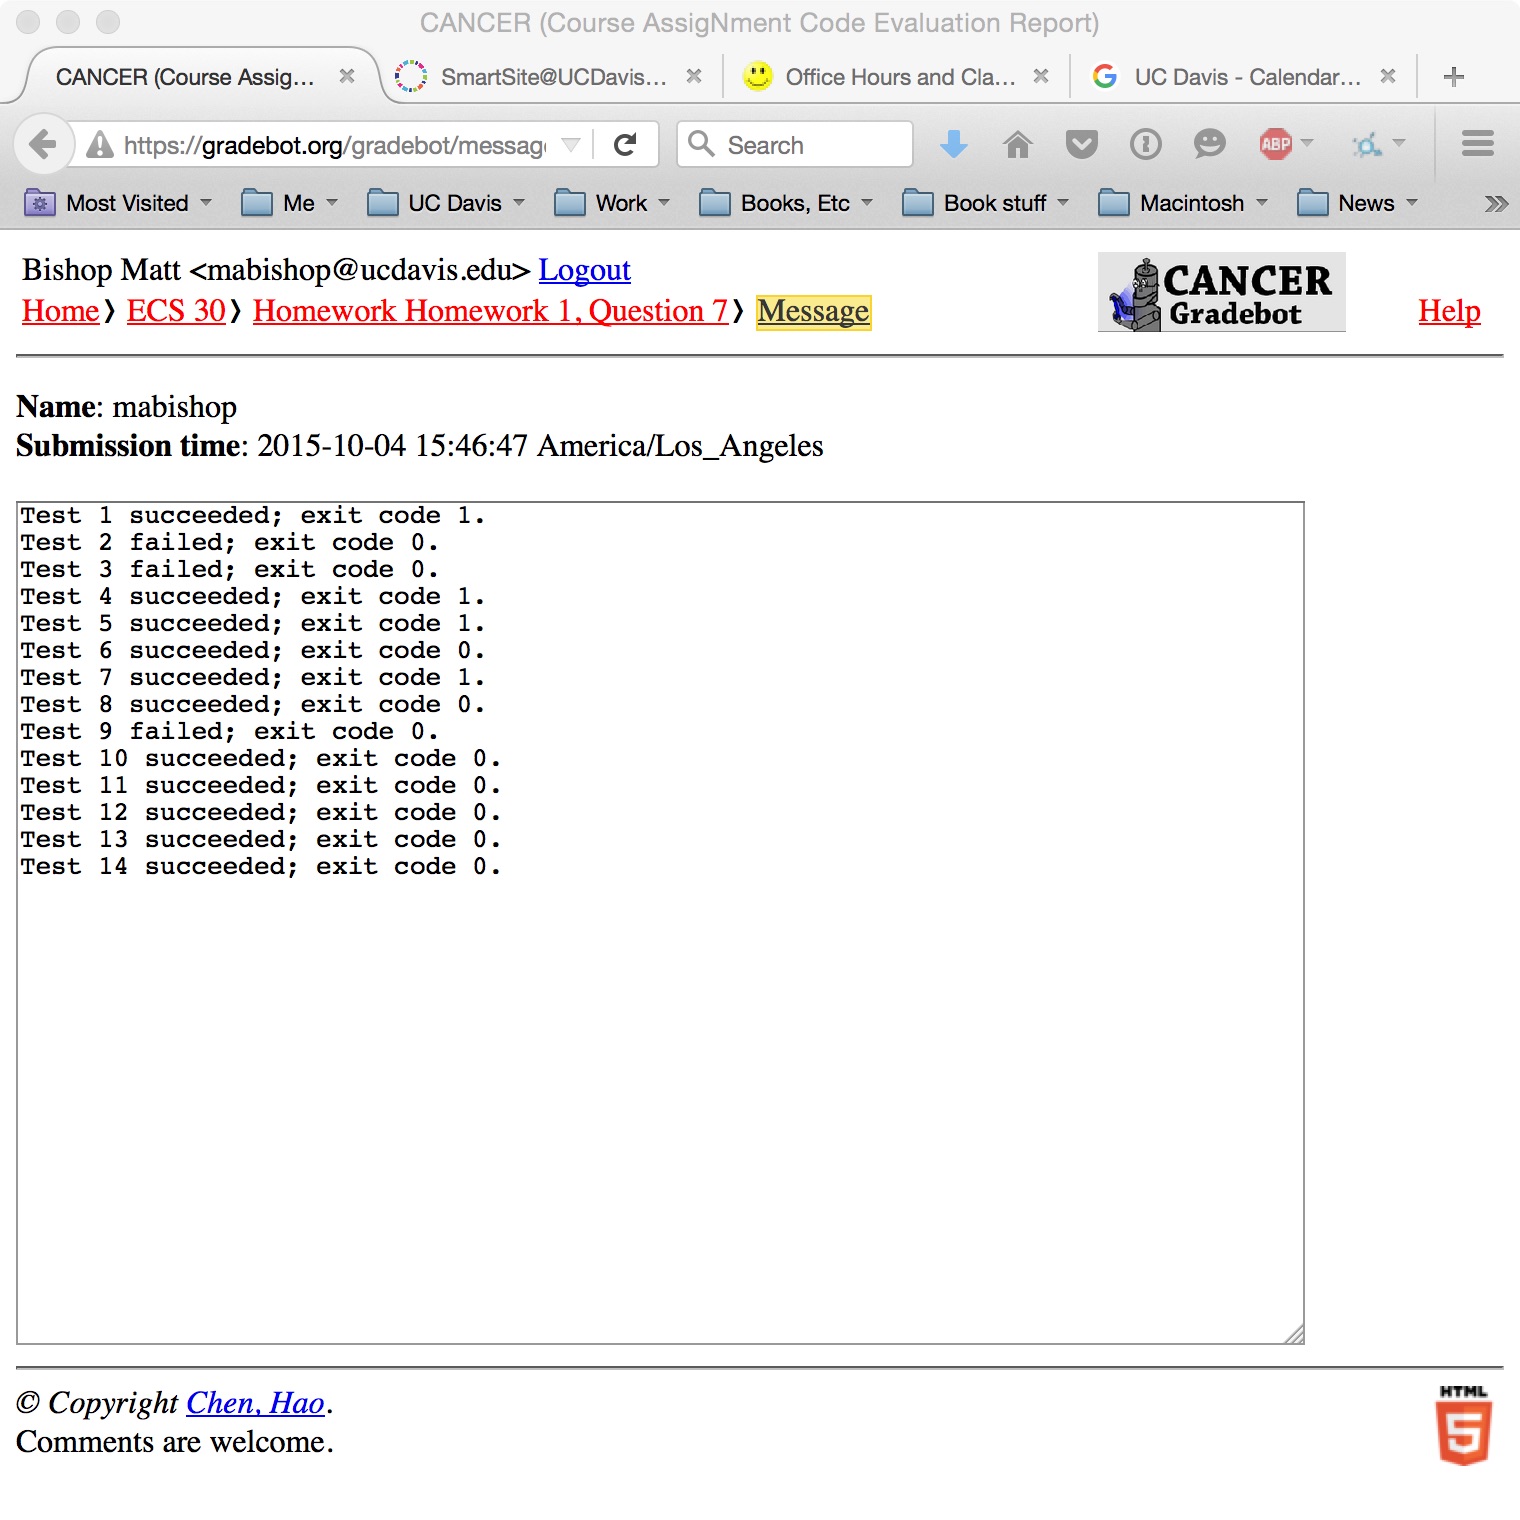
For correctness, please submit the program to the Gradebot (see below). The Gradebot will compile and run your program, and present you with the results of the test input. The results will simply say whether the program produced the correct output (or error messages) for the test. If you did not get all the tests right, then you can fix your program and resubmit it. The results shown on the Gradebot will form the correctness portion of your score.
For style, we look for well-commented, easy to read code. The document Program Style gives guidelines that you should follow. In particular, the guidelines about comments are critical because comments enable others to read and understand your code. And the “other” could be you, several weeks from now!
You are to submit the final version of the source code of your program to SmartSite. That file, or those files, are to be named as stated in the homework assignment.
The debugging portion of the homework assignment requires you to fix a buggy program. The problems may be compiling problems (there will be errors, not warnings), execution problems (where the program runs but gives the wrong output), or both. As you debug the program, put comments into the source describing what changes you make.
Turn in the modified source file(s). If you are asked to use gdb(1), include a file showing the gdb commands you typed, the results, and what those results tell you. This file should be called “gdb.txt” or “gdb.pdf” (depending on whether you use text or PDF; see below). If you have screenshots and do not embed them in the submitted file, put a reference to them in that file and submit them as separate files named “gdbn.ext”, where n is an integer and ext is an extension indicating the type of image file (like “jpg”, “tif”, or “gif”).
All homework is due at 11:55PM on the due date, unless noted otherwise on the assignment. These will be graded and comments returned to you as quickly as possible; we’ll try for three class periods, but can’t guarantee it.
As stated above, all written homework must be submitted as text (ASCII) or as PDF (you can use any text processor you like to generate these). Please do not submit Microsoft Word (or similar) files; because the graders may grade these on UNIX-based and Linux systems, they will not be able to read those files. If your file is an ASCII file, please choose a name that ends in “.txt”. If your file is a PDF file, please choose a name that ends in “.pdf”. If you have screenshots or other images and do not embed them in the submitted file, put a reference to them in that file and submit them as separate files named “base{n.ext”, where base is the base name of the file, n is an integer and ext is an extension indicating the type of image file (like “jpg”, “tif”, or “gif”).
For programs, turn in the source code file(s). As we will grade them using systems in the CSIF, please check that your programs run on one of the Linux systems there.
Please turn in your written exercises and programs electronically through SmartSite. If you need to turn in something on paper (for example, a diagram that you can’t draw using your text processing program), please hand it to the professor or TA before the assignment is due, and put a note in what you submit electronically that you have done this. (That way, the reader will know to look for something written, rather than mark you off for that problem.)
When you are asked to analyze something, or explain something, write clearly and cogently and use proper English — if we can’t understand it, it’s wrong. If the question asks for an opinion, state your opinion clearly, justify it, and don’t ramble. Answers that start, “My opinion is yes …” and conclude with “… on the other hand it could equally well be no” won’t get much credit.
Please do not leave assignments for the last minute. The assignments are non-trivial and will require significant design time before you start programming and debugging. When we decide on the due dates, we assume you will spend significant amounts of time on design as well as coding and debugging. If you choose not to do this, you will have difficulty finishing the assignments on time.
Please take the time to design your program carefully. More programming problems arise from improper design than anything else, and the few hours you spend on design will be amply repaid by shorter coding and debugging phases. So please think the design and interfaces through, and — as always — try to find the simplest way to do the assignment (within the limits given in the assignment, of course)!
We do not mind being asked for help; indeed, we welcome it because it helps us know what students are finding difficult or confusing, and sometimes a few words about the problem in class will clarify the assignment immensely. We do mind being asked for help before you have tried to think the problem through. The classic objectionable question (this really happened) occurred on a homework assignment in which the class was given a buggy program. The assignment said the program did not work, and the homework was to debug it and make it work. That particular class period discussed how to deal with bugs, and gave tips and techniques on how to debug programs. Within 10 minutes of the end of the class during which the assignment was given out, the instructor got this request for help: “The program doesn’t run. What do I do now?”
So, before asking for help, please be sure that you have:
When you come to us, or send us a note, asking for help, please show us whatever you have done to solve the problem, because the first question we will ask you is “What have you tried?” This isn’t because we think you’re wasting our time. It’s because understanding how you have tried to solve the problem will help us figure out exactly what your difficulty is and what we can do to help you. Remember, we will do everything we can to avoid solving the problem for you. When we give you help, our goal is to help you solve the problem yourself.
In general, late homework will not be accepted. Requests for exceptions will be handled on a case-by-case basis; for example, medical reasons tend to get extensions. So please do feel free to ask!
If you feel that there is an error in grading, please come see a TA and we’ll look over it (and possibly talk with you about it). However, don’t dally; any such request must be made within one week of when the grades were made available. After that, we won’t change your grade.
The Gradebot is a system developed by Prof. Hao Chen to grade your programs automatically. It allows repeated resubmissions, so you can submit your program for grading multiple times. We will use the last score you get on that system. Here, we show you how to submit your program and look at the results. But first, you have to register on the Gradebot.
Every student on the roster in this class has been added as a student. Go to https://gradebot.org/gradebot and use your UC Davis email address (youmust use this!). Then follow the instructions. Once you have registered, log in and complete your profile. The critical part here is to add your student ID, because we will use that to track scores. In other words, if it isn’t there or is wrong, there is a very good chance you won’t get credit for your scores. Also, be aware there is a feature that allows everyone in the class to see your screen name, avatar, and score, but not your student ID or user name. So do not choose your real name or UCD email as your screen name, or your photograph as your avatar, unless you want people to know how you are doing on the scoreboard!
Once you register, you will receive email from the Gradebot with a “private key”. You will use this to submit homework. This private key will be in a file attachment called “id_dsa”. When you get this key, do the following:
% mkdir .sshThe “.” in front of the “ssh” is critical — leave that out, and nothing will work.
% cp id_dsa ~/.ssh
% chmod -R go= ~/.sshThe option “-R” means to apply the command recursively, that is to the directory you name, all the files and subdirectories in it, and all their files and subdirectories, and so forth. The “go=” means set the “g” (group) and “o” (other) permissions to nothing (the “=” with nothing after it).
Using the Gradebot involves a program called git(1). You don’t have to know how it works or what it does as long as you follow these steps.\footnote{Oh, all right. It is a source code control system that keeps track of the versions of your program. Basically, you create and edit your program on your computer. You then transfer your program to a remote git repository. As you update your program and transfer the newer versions to the repository, git keeps track of the changes. That way, you can always “go back” to an earlier version.}
% git clone metastasis@gradebot.org:user/your_username/1/hw_numwhere your_username is your UC Davis email id (without the “@ucdavis.edu”) and hw_num is the homework assignment number. For example, the first homework program has a hw_num of 1. So, when I want to create the directory, I would type:
% git clone metastasis@gradebot.org:user/mabishop/1/1As you can see, I will get several warnings (which I, and you, should ignore). When the command finishes, I will have a directory called “1”
Cloning into '1'...
bash: warning: setlocale: LC_ALL: cannot change locale (en_US.ISO8859-1)
perl: warning: Setting locale failed.
perl: warning: Please check that your locale settings:
LANGUAGE = (unset),
LC_ALL = "en_US.ISO8859-1",
LANG = "en_US.UTF-8"
are supported and installed on your system.
perl: warning: Falling back to the standard locale ("C").
remote: Counting objects: 20, done.
remote: Compressing objects: 100% (13/13), done.
remote: Total 20 (delta 5), reused 0 (delta 0)
Receiving objects: 100% (20/20), done.
Resolving deltas: 100% (5/5), done.
Checking connectivity... done.
If you are asked for a password, you didn’t put the file “id_dsa” in the right place. Go back to that step, and be sure the file goes into the “.ssh” subdirectory of your home directory.
Now the hard part. I write a version of the program and submit it to the Gradebot for testing. Here, I will assume you have written the program and it is in a file called “prog.c” and it is in the directory “1” that you created in the previous step. You will then submit it to the Gradebot for testing, as follows:
% git add prog.cUnless something goes wrong (like you mistyped the file name), this command should give no output.
% git commit -a [master 2f1eef7] minor comment change for demo purposesThis will start a text editor, and the window will have several lines of text beginning with “#”. Add a brief comment after the last line saying what you have changed. Then save the file.1 If you see output similar to that above you can safely ignore it (it’s a configuration suggestion, not an error).
Committer: Matt Bishop <bishop@pc24.cs.ucdavis.edu>
Your name and email address were configured automatically based
on your username and hostname. Please check that they are accurate.
You can suppress this message by setting them explicitly. Run the
following command and follow the instructions in your editor to edit
your configuration file:
git config –global –edit
After doing this, you may fix the identity used for this commit with:
git commit –amend –reset-author
1 file changed, 1 insertion(+), 1 deletion(-)
%git push origin masterThe Gradebot will automatically run your program.
bash: warning: setlocale: LC_ALL: cannot change locale (en_US.ISO8859-1)
perl: warning: Setting locale failed.
perl: warning: Please check that your locale settings:
LANGUAGE = (unset),
LC_ALL = "en_US.ISO8859-1",
LANG = "en_US.UTF-8"
are supported and installed on your system.
perl: warning: Falling back to the standard locale ("C").
Counting objects: 3, done.
Delta compression using up to 8 threads.
Compressing objects: 100% (2/2), done.
Writing objects: 100% (3/3), 297 bytes | 0 bytes/s, done.
Total 3 (delta 1), reused 0 (delta 0)
remote: perl: warning: Setting locale failed.
remote: perl: warning: Please check that your locale settings:
remote: LANGUAGE = (unset),
remote: LC_ALL = "en_US.ISO8859-1",
remote: LANG = "en_US.UTF-8"
remote: are supported and installed on your system.
remote: perl: warning: Falling back to the standard locale ("C").
remote: Gradebot accepted your submission. Good luck.
To metastasis@gradebot.org:user/mabishop/1/1
f9cc30f..2f1eef7 master -> master
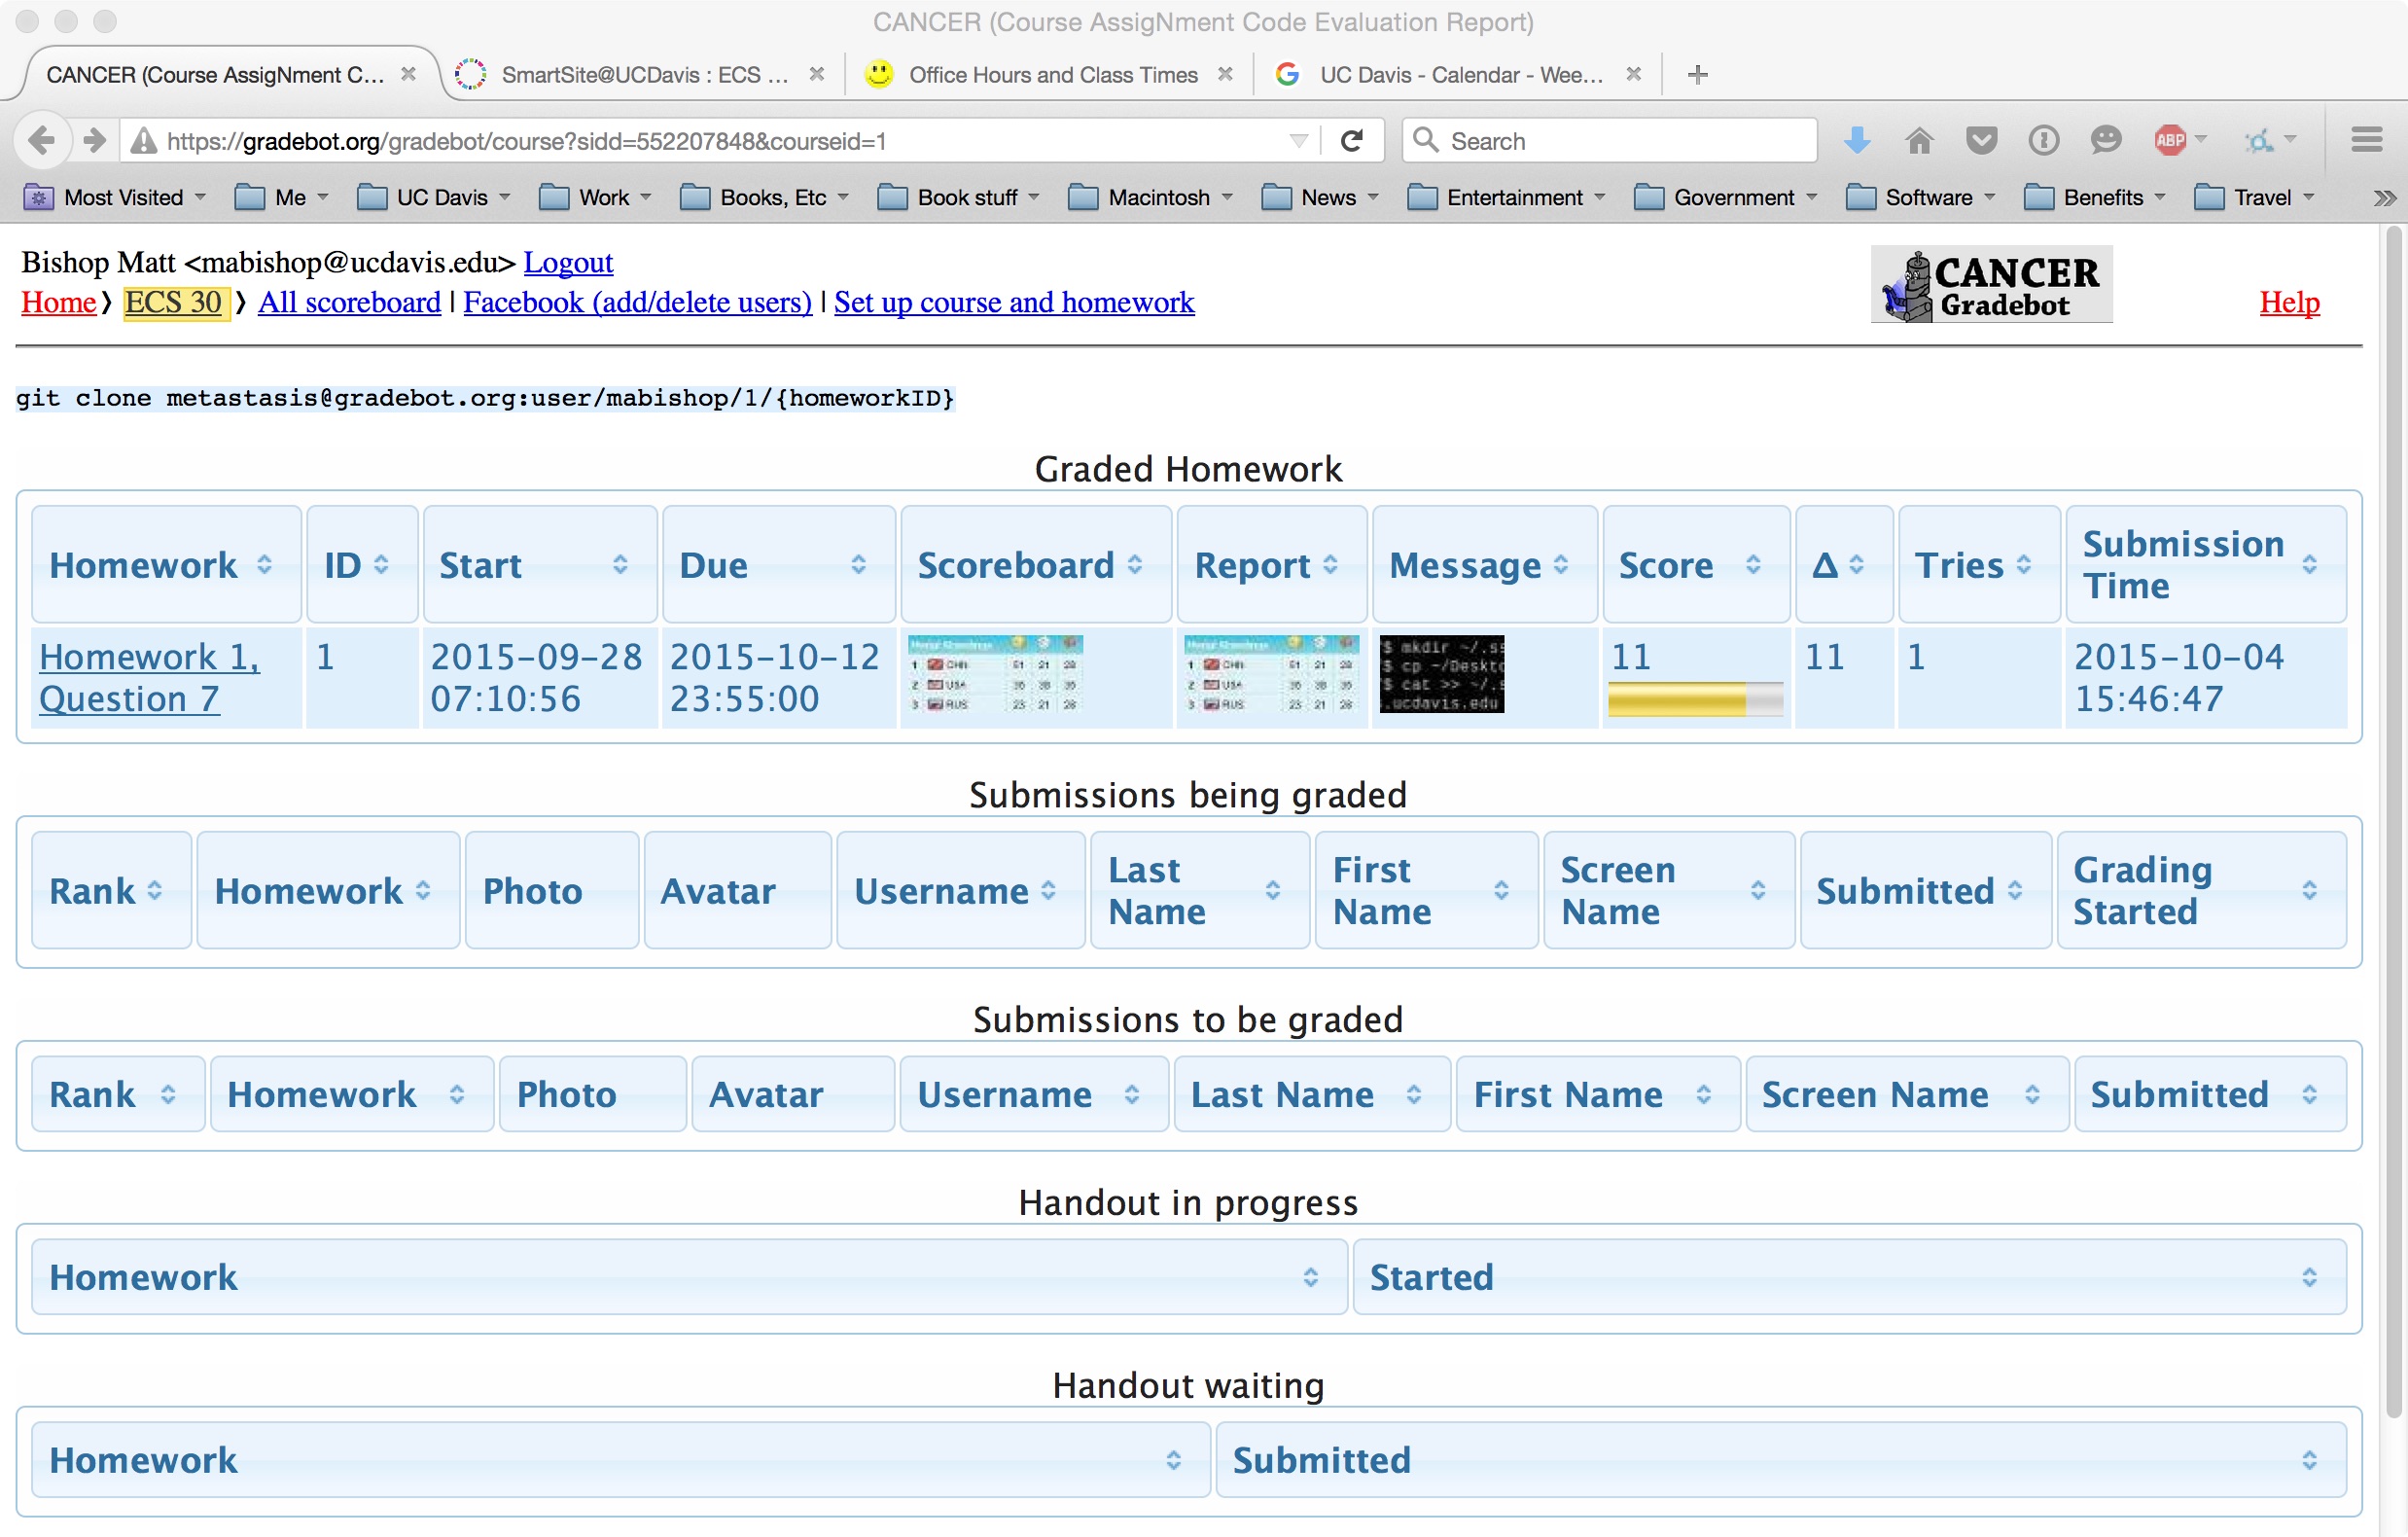
Go to https://gradebot.org/gradebot, click on “ECS 30”, and look at the “Graded Homework” section. Your assignment should be there. Look over at the “Score” column. The horizontal bar in that entry should be green and extend all the way across the entry. That means you got all the test cases right (good job!). If it doesn’t, the bar will be yellow or red, indicating you missed some tests.
Here is the result of my first try at writing the program for the first homework.
As programs are run, the Gradebot makes available a scoreboard that contains your rank, avatar, screen name, messages, score, change, number of tries, and the time of last run. All registered students can see this.
This is why you must choose your screen name and avatar carefully. In particular, if you want privacy, make them something not connected with you.
If you got all the cases correct, you’re done! Otherwise, figure out what is wrong with your program, change it, and repeat steps 2–5. You can repeat these steps as many times as you like; we’ll only take the last score.
Remember to submit the final version of your program through SmartSite!
| You can also obtain a PDF version of this. | Version of October 5, 2015 at 6:58AM |